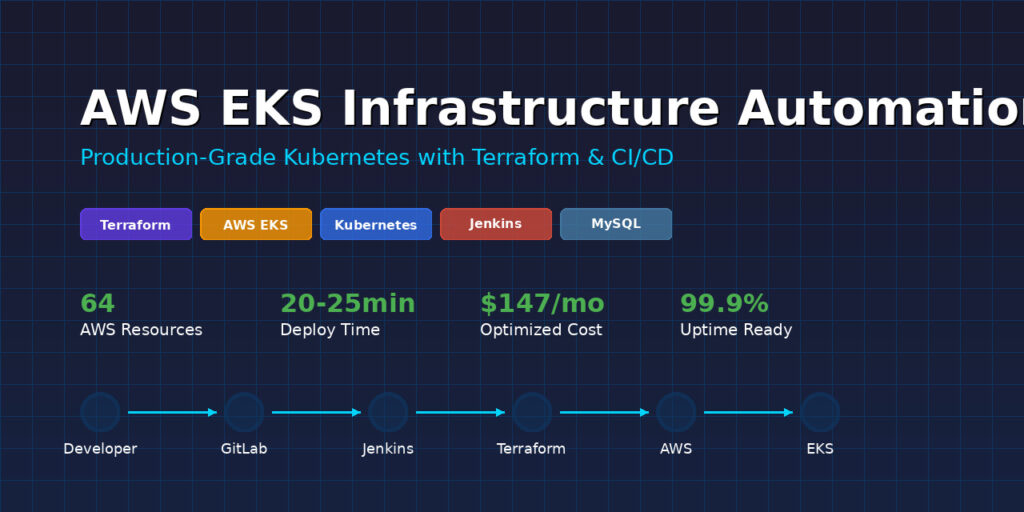
AWS EKS Infrastructure Automation with Terraform & Jenkins
Table of Contents
- Project Overview
- Architecture
- Technologies Used
- Key Features
- What I Learned
- Quick Start
- Detailed Setup Guide
- CI/CD Pipeline
- Project Structure
- Challenges & Solutions
- Cost Optimization
- Future Enhancements
- Contact
Project Overview
The Challenge
Modern cloud infrastructure requires more than just clicking buttons in a web console. Organizations need automated, repeatable, and version-controlled infrastructure that can be deployed consistently across environments.
The Solution
I built a production-grade automated infrastructure deployment pipeline that provisions a complete AWS EKS (Elastic Kubernetes Service) cluster using Infrastructure as Code principles. The entire infrastructure—from networking to database deployment—is defined in code, version-controlled in GitLab, and automatically deployed through Jenkins CI/CD.
Real-World Impact
This project demonstrates skills that directly translate to enterprise DevOps roles:
- Automated cloud provisioning reduces deployment time from hours to minutes
- Infrastructure as Code eliminates configuration drift and manual errors
- CI/CD integration enables rapid, reliable deployments
- Kubernetes orchestration provides scalable application hosting
- Cost optimization through smart resource management
🛠️ Technologies Used
Infrastructure & Cloud
- Terraform (v1.6.1) – Infrastructure as Code tool
- AWS EKS (v1.32) – Managed Kubernetes service
- AWS VPC – Virtual Private Cloud networking
- AWS EC2 – Compute instances for Kubernetes nodes
- AWS EBS – Persistent storage volumes
Container Orchestration
- Kubernetes (v1.32) – Container orchestration platform
- Helm (v2.11.0) – Kubernetes package manager
- AWS Fargate – Serverless container runtime
CI/CD & Version Control
- Jenkins – Automation server for CI/CD
- GitLab – Source code management and version control
- Git – Distributed version control
Database
- MySQL (Bitnami Chart v9.14.1) – Relational database with replication
- 1 Primary instance
- 2 Secondary replicas for high availability
Configuration Management
- Terraform Modules:
terraform-aws-modules/vpc/aws(v5.2.0)terraform-aws-modules/eks/aws(v19.20.0)
✨ Key Features
🔄 Automated Infrastructure Provisioning
- One-Click Deployment: Entire infrastructure created from a single Terraform apply
- Repeatable: Destroy and recreate identical environments instantly
- Version Controlled: All infrastructure changes tracked in Git
🌐 High-Availability Networking
- Multi-AZ Deployment: Resources spread across 3 availability zones
- Private Networking: Worker nodes isolated in private subnets
- Secure Internet Access: NAT Gateway for outbound connections
- Load Balancer Ready: Subnet tagging for automatic LB discovery
☸️ Production-Grade Kubernetes Cluster
- Managed Control Plane: AWS handles master node management
- Auto-Scaling Nodes: 1-3 worker nodes based on demand
- Fargate Integration: Serverless pods for “my-app” namespace
- EBS CSI Driver: Dynamic persistent volume provisioning
🗄️ Highly Available Database
- Master-Slave Replication: 1 primary + 2 secondary MySQL instances
- Persistent Storage: EBS volumes with gp2 storage class
- Automatic Failover: Kubernetes handles pod rescheduling
🚀 CI/CD Pipeline
- Manual Approval Gates: Review changes before applying
- Plan Before Apply: Preview infrastructure changes
- Safe Destroy Option: Protected destruction with confirmation
- Automated Testing: Terraform validation on every build
💰 Cost Optimization
- Single NAT Gateway: Reduced from 3 to 1 (saves ~$64/month)
- Right-Sized Instances: t3.small instead of t3.medium
- On-Demand Pricing: No long-term commitments
- Easy Teardown: Destroy infrastructure when not needed
What I Learned
Technical Skills
Infrastructure as Code
- Writing modular, reusable Terraform configurations
- Managing state files remotely in S3
- Using Terraform modules for best practices
- Handling provider version constraints and lock files
AWS Networking
- Designing VPCs with public/private subnet architecture
- Implementing NAT gateways for private subnet internet access
- Subnet tagging for Kubernetes integration
- Security group configuration for EKS
Kubernetes & EKS
- Understanding EKS control plane vs worker nodes
- Configuring node groups with launch templates
- Setting up Fargate profiles for serverless workloads
- Installing and managing the EBS CSI driver
CI/CD & Automation
- Building Jenkins pipelines with Jenkinsfile
- Integrating GitLab with Jenkins
- Implementing approval gates and safeguards
- Managing credentials securely in CI/CD
Helm & Package Management
- Deploying applications using Helm charts
- Configuring values for production deployments
- Understanding chart versions and dependencies
Problem-Solving Skills
Debugging Complex Issues
- Dependency Cycles: Resolved Terraform circular dependencies by using exec authentication instead of data sources
- Provider Syntax Errors: Learned version-specific Helm provider syntax differences
- Version Conflicts: Managed Terraform lock file conflicts across environments
- Timeout Issues: Diagnosed and optimized slow infrastructure deployments
Performance Optimization
- Reduced deployment time from 60+ minutes to 20-25 minutes
- Optimized NAT gateway configuration for cost and speed
- Right-sized EC2 instances for workload requirements
Best Practices
- Always use module outputs instead of data sources for provider configuration
- Pin provider versions for reproducibility
- Implement approval gates for destructive operations
- Document configuration decisions for future reference
Quick Start
Prerequisites
# Required tools
terraform --version  # >= 1.6.1
aws --version       # AWS CLI configured
kubectl version     # Kubernetes CLI
git --version       # Git for version control
5-Minute Setup
# 1. Clone the repository
git clone https://gitlab.com/ascharle/eks-terra.git
cd eks-terra

# 2. Configure AWS credentials
aws configure

# 3. Initialize Terraform
terraform init

# 4. Review the plan
terraform plan

# 5. Deploy infrastructure
terraform apply

# 6. Configure kubectl
aws eks update-kubeconfig --name my-cluster --region us-east-2

# 7. Verify deployment
kubectl get nodes
kubectl get pods
That’s it! Your EKS cluster is running. ✅
📖 Detailed Setup Guide
Step 1: Prerequisites Setup
Install Required Tools
Terraform:
# macOS
brew install terraform

# Linux
wget https://releases.hashicorp.com/terraform/1.6.1/terraform_1.6.1_linux_amd64.zip
unzip terraform_1.6.1_linux_amd64.zip
sudo mv terraform /usr/local/bin/

# Verify
terraform version
AWS CLI:
# macOS
brew install awscli

# Linux
curl "https://awscli.amazonaws.com/awscli-exe-linux-x86_64.zip" -o "awscliv2.zip"
unzip awscliv2.zip
sudo ./aws/install

# Configure
aws configure
# Enter your Access Key ID, Secret Key, Region (us-east-2), Output format (json)
kubectl:
# macOS
brew install kubectl

# Linux
curl -LO "https://dl.k8s.io/release/$(curl -L -s https://dl.k8s.io/release/stable.txt)/bin/linux/amd64/kubectl"
sudo install -o root -g root -m 0755 kubectl /usr/local/bin/kubectl
AWS Account Setup
- Create an AWS account (free tier eligible)
- Create an IAM user with permissions:
AmazonEKSClusterPolicyAmazonEKSWorkerNodePolicyAmazonEC2FullAccessAmazonVPCFullAccessIAMFullAccess
- Generate access keys
- Configure AWS CLI with credentials
Step 2: Repository Setup
# Clone the repository
git clone https://gitlab.com/ascharle/eks-terra.git
cd eks-terra

# Review the configuration files
ls -la
# providers.tf - AWS provider and backend configuration
# vpc.tf - Network infrastructure
# eks.tf - EKS cluster and node groups
# mysql.tf - MySQL Helm chart deployment
# variables.tf - Variable definitions
# terraform.tfvars - Variable values
# outputs.tf - Output definitions
Step 3: Customize Configuration (Optional)
Edit terraform.tfvars:
env_prefix     = "dev"           # Environment prefix
k8s_version    = "1.32"          # Kubernetes version
cluster_name   = "my-cluster"    # EKS cluster name
region         = "us-east-2"     # AWS region
Modify instance types in eks.tf:
eks_managed_node_groups = {
  main = {
    instance_types = ["t3.small"]  # Change to t3.medium for more resources
    min_size       = 1             # Minimum nodes
    max_size       = 3             # Maximum nodes
    desired_size   = 2             # Desired nodes
  }
}
Step 4: Deploy Infrastructure
# Initialize Terraform (downloads providers and modules)
terraform init

# Validate configuration syntax
terraform validate

# Preview changes (IMPORTANT: Review before applying!)
terraform plan

# Apply changes
terraform apply

# Review the plan output
# Type 'yes' when prompted

# Wait 20-25 minutes for deployment to complete
What happens during deployment:
- VPC and networking (3-5 min)
- EKS cluster control plane (10-12 min)
- Worker nodes (5-7 min)
- Fargate profile (2-3 min)
- MySQL database (2-3 min)
Step 5: Verify Deployment
# Configure kubectl to use the new cluster
aws eks update-kubeconfig --name my-cluster --region us-east-2

# Check cluster nodes
kubectl get nodes
# Should show 2 nodes in "Ready" status

# Check all pods
kubectl get pods -A
# Should see system pods + MySQL pods

# Check MySQL specifically
kubectl get pods -l app.kubernetes.io/name=mysql
# Should show:
# mysql-primary-0      1/1  Running
# mysql-secondary-0    1/1  Running
# mysql-secondary-1    1/1  Running

# Get cluster endpoint
kubectl cluster-info
Step 6: Access MySQL (Optional)
# Forward MySQL port to localhost
kubectl port-forward svc/mysql 3306:3306

# In another terminal, connect to MySQL
mysql -h 127.0.0.1 -P 3306 -u root -p
# Password: my-secret-pw (from mysql.tf)

# Run test queries
mysql> SHOW DATABASES;
mysql> CREATE DATABASE test;
mysql> USE test;
mysql> CREATE TABLE users (id INT, name VARCHAR(50));
mysql> INSERT INTO users VALUES (1, 'Test User');
mysql> SELECT * FROM users;
Step 7: Clean Up (When Done)
# IMPORTANT: This destroys everything!
terraform destroy

# Review what will be deleted
# Type 'yes' when prompted

# Wait 10-15 minutes for cleanup

# Verify all resources are deleted
aws eks list-clusters --region us-east-2
# Should be empty
CI/CD Pipeline
Pipeline Architecture
graph LR
    A[Developer] -->|Push Code| B[GitLab]
    B -->|Manual Trigger| C[Jenkins]
    C -->|Pull Code| B
    C -->|Plan| D{Review Plan}
    D -->|Approve| E[Terraform Apply]
    D -->|Reject| F[Cancel]
    E --> G[AWS Infrastructure]
Jenkins Pipeline Stages
Pipeline Flow:
graph TD
    A[Checkout Code] --> B[Verify AWS Access]
    B --> C[Terraform Init]
    C --> D[Terraform Validate]
    D --> E{Action Selected}

    E -->|plan| F[Generate Plan]
    E -->|apply| G[Generate Plan]
    E -->|destroy| H[Destroy Approval]

    G --> I[Manual Approval]
    I --> J[Apply Infrastructure]

    H --> K[Type DESTROY]
    K --> L[Destroy Infrastructure]

    F --> M[Complete]
    J --> N[Get Outputs]
Pipeline Parameters
When you trigger a build in Jenkins, you choose:
1. ACTION:
- plan – Preview changes without modifying anything (always safe)
- apply – Create or update infrastructure (requires approval)
- destroy – Delete all resources (requires typing “DESTROY”)
2. AUTO_APPROVE:
- false (recommended) – Manual approval required
- true – Skip approval (dangerous!)
How to Use the Pipeline
Deploy New Infrastructure
1. Open Jenkins → eks-build job
2. Click "Build with Parameters"
3. Select:
   - ACTION: apply
   - AUTO_APPROVE: false
4. Click "Build"
5. Watch the plan output
6. Click "Apply" to proceed or "Abort" to cancel
7. Wait for completion (~20-25 minutes)
Preview Changes Only
1. Jenkins → eks-build job
2. Build with Parameters
3. Select:
   - ACTION: plan
4. Click "Build"
5. Review the plan (no changes made)
Destroy Infrastructure
1. Jenkins → eks-build job
2. Build with Parameters
3. Select:
   - ACTION: destroy
   - AUTO_APPROVE: false
4. Click "Build"
5. Jenkins asks: "Type DESTROY to confirm"
6. Type exactly: DESTROY
7. Click OK
8. Infrastructure is deleted (~10 minutes)
Pipeline Security Features
No automatic deployments – You control when changes happen
Manual approval gates – Review before applying
Destroy confirmation – Type “DESTROY” to prevent accidents
Plan artifacts – Download and review plans offline
Credential management – AWS keys secured in Jenkins
Setting Up the Pipeline
See JENKINS file for complete setup instructions including:
- Jenkins installation
- GitLab integration
- Credential configuration
- Webhook setup (optional)
Project Structure
eks-terra/
├── README.md                  # This file
├── JENKINS.md                 # CI/CD setup guide
├── .gitignore                 # Ignored files
├── Jenkinsfile                # Jenkins pipeline definition
│
├── providers.tf               # Terraform & provider configuration
├── variables.tf               # Variable declarations
├── terraform.tfvars          # Variable values (DO NOT COMMIT with secrets)
├── outputs.tf                # Output definitions
│
├── vpc.tf                    # VPC and networking resources
├── eks.tf                    # EKS cluster and node groups
├── mysql.tf                  # MySQL Helm chart deployment
│
File Descriptions
Core Terraform Files:
-
providers.tf
- Terraform version requirements (>= 1.6.1)
- Provider versions (AWS, Kubernetes, Helm)
- S3 backend configuration for state storage
- Provider authentication settings
-
variables.tf
- Input variable definitions
- Types, descriptions, and default values
- Includes: region, cluster_name, k8s_version, env_prefix
-
terraform.tfvars
- Actual variable values
- DO NOT commit with real AWS credentials!
- Example values for non-sensitive data
-
outputs.tf
- Cluster endpoint URL
- kubectl configuration command
- VPC ID and subnet IDs
- Security group IDs
Infrastructure Files:
-
vpc.tf
- VPC with CIDR 10.0.0.0/16
- 3 public subnets (10.0.101-103.0/24)
- 3 private subnets (10.0.1-3.0/24)
- Internet Gateway for public subnets
- NAT Gateway for private subnet internet access
- Route tables and associations
- Kubernetes-specific subnet tags
-
eks.tf
- EKS cluster (v1.32)
- Managed node group (1-3 t3.small instances)
- Fargate profile for “my-app” namespace
- EBS CSI driver addon
- IAM roles and policies
- Security groups
- CloudWatch logging
-
mysql.tf
- Helm release configuration
- Bitnami MySQL chart (v9.14.1)
- Replication architecture (1 primary + 2 secondaries)
- EBS persistent volumes
- Database credentials
CI/CD Files:
-
Jenkinsfile
- Declarative pipeline syntax
- Three actions: plan, apply, destroy
- Approval gates for safety
- Error handling and cleanup
-
.gitignore
- Terraform state files
- Lock files
- Variable files with secrets
- Local directories
Challenges & Solutions
Challenge 1: Terraform Dependency Cycle
Problem:
Error: Cycle detected:
  provider[kubernetes] → data.aws_eks_cluster
  data.aws_eks_cluster → module.eks
  module.eks → kubernetes_config_map.aws_auth
  kubernetes_config_map.aws_auth → provider[kubernetes]
Root Cause:
The Kubernetes provider tried to authenticate using data sources that depended on the EKS module, which created resources using the Kubernetes provider. Classic circular dependency!
Solution:
Switched from data source authentication to exec authentication:
# OLD (causes cycle):
provider "kubernetes" {
  host  = data.aws_eks_cluster.cluster.endpoint
  token = data.aws_eks_cluster_auth.cluster.token
}

# NEW (no cycle):
provider "kubernetes" {
  host = module.eks.cluster_endpoint
  exec {
    command = "aws"
    args    = ["eks", "get-token", "--cluster-name", var.cluster_name]
  }
}
Why it works: Module outputs are direct references (no dependency on data sources), and exec authentication generates tokens dynamically without data sources.
Learning: Always prefer module outputs over data sources when configuring providers.
Challenge 2: Helm Provider Version Syntax
Problem:
Error: Unsupported block type "kubernetes"
Did you mean to define argument "kubernetes"?
If so, use the equals sign to assign it a value.
Root Cause:
Helm provider syntax changed between versions:
- v2.x uses block syntax:
kubernetes { } - v3.x uses argument syntax:
kubernetes = { }
Solution:
Matched syntax to provider version:
# For Helm v2.11.0 (project requirement):
provider "helm" {
  kubernetes {  # No equals sign!
    host = module.eks.cluster_endpoint
    # ...
  }
}
Learning: Always check version-specific documentation. Lock file mismatches can cause subtle syntax errors.
Challenge 3: Instance Type Free Tier Restriction
Problem:
Error: InvalidParameterCombination
The specified instance type is not eligible for Free Tier.
Root Cause:
AWS Free Tier only allows t2.micro and t3.micro instances. Initially used t3.medium which isn’t eligible.
Solution:
Changed to t3.small (good balance of resources and cost):
instance_types = ["t3.small"] # 2 vCPUs, 2GB RAM
Cost comparison:
- t3.medium: ~$0.0416/hour (~$90/month for 3 nodes)
- t3.small: ~$0.0208/hour (~$45/month for 3 nodes)
Learning: Always verify instance types against account quotas and Free Tier eligibility.
Challenge 4: Slow Infrastructure Deployment
Problem:
Initial deployments took 60+ minutes, with node group timeouts.
Root Cause:
- 3 NAT Gateways (one per AZ) instead of 1
- Unnecessary VPN gateway
- Complex networking setup
Solution:
Optimized VPC configuration:
# Before:
enable_nat_gateway = true
# (created 3 NAT gateways)

# After:
enable_nat_gateway   = true
single_nat_gateway   = true  # Only 1 NAT gateway
# Removed: enable_vpn_gateway = true
Results:
- Deployment time: 60+ min → 20-25 min
- Monthly cost savings: ~$64 (2 fewer NAT gateways)
Learning: Start with minimum viable configuration, scale up only when needed.
Challenge 5: Terraform Lock File Conflicts
Problem:
Error: hashicorp/helm locked to 3.1.1
but configured version constraint requires ~> 2.11.0
Root Cause:
.terraform.lock.hcl file committed to Git locked providers to wrong versions across different environments.
Solution:
Added lock file to .gitignore:
.terraform.lock.hcl
Each environment (local, Jenkins) maintains its own lock file with correct versions.
Alternative for teams:
Run terraform init -upgrade to update lock file, then commit the updated version.
Learning: For personal projects, don’t commit lock files. For teams, commit them but keep them updated.
Challenge 6: Swapped Subnet Tags
Problem:
Subnet tags were backwards:
- Private subnets tagged for public load balancers
- Public subnets tagged for internal load balancers
Solution:
# Private subnets (for internal ELB):
tags = {
  "kubernetes.io/role/internal-elb" = "1"
}

# Public subnets (for external ELB):
tags = {
  "kubernetes.io/role/elb" = "1"
}
Impact:
Won’t break deployment but will cause issues when creating LoadBalancer services later.
Learning: Subnet tagging is critical for Kubernetes AWS integration.
Challenge 7: Path Issues in CI/CD
Problem:
Error: permission denied: /home/charles/terra-pro/values.yaml
Root Cause:
Hardcoded absolute path that worked locally but failed in Jenkins:
# BAD:
values = [file("/home/charles/terra-pro/values.yaml")]
Solution:
Use relative path with ${path.module}:
# GOOD:
values = [file("${path.module}/values.yaml")]
Even better solution:
Replaced values file with set blocks (no file needed):
set {
  name  = "architecture"
  value = "replication"
}
Learning: Never use absolute paths in infrastructure code. Use relative paths or eliminate external files.
Cost Optimization
Current Monthly Cost Estimate
If running 24/7 in us-east-2:
| Resource | Quantity | Unit Cost | Monthly Cost |
|---|---|---|---|
| EKS Control Plane | 1 | $0.10/hour | ~$72 |
| Worker Nodes (t3.small) | 2 | $0.0208/hour | ~$30 |
| NAT Gateway | 1 | $0.045/hour | ~$32 |
| NAT Data Transfer | ~100GB | $0.045/GB | ~$5 |
| EBS Volumes (gp2) | 3 x 20GB | $0.10/GB/month | ~$6 |
| CloudWatch Logs | Minimal | Variable | ~$2 |
| TOTAL | ~$147/month |
Cost Savings Implemented
✅ Single NAT Gateway
- Before: 3 NAT gateways ($96/month)
- After: 1 NAT gateway ($32/month)
- Savings: $64/month (67% reduction)
✅ Right-Sized Instances
- Before: 3x t3.medium ($90/month)
- After: 2x t3.small ($30/month)
- Savings: $60/month (67% reduction)
✅ Removed Unnecessary Resources
- Removed VPN Gateway (would be $36/month)
- Reduced node count from 3 to 2
Total Monthly Savings: ~$160 🎉
Additional Cost Optimization Tips
1. Use Spot Instances (Advanced)
capacity_type = "SPOT"  # Instead of "ON_DEMAND"
# Savings: Up to 70% on EC2 costs
2. Auto-Scaling Based on Time
# Scale down during nights/weekends
kubectl scale deployment --replicas=0 my-app
# Or use Karpenter for intelligent scaling
3. Destroy When Not In Use
# Weekend shutdown
terraform destroy  # Friday evening
terraform apply    # Monday morning
# Savings: ~$100/weekend
4. Use AWS Free Tier
- 750 hours/month of t2.micro (covers 1 node 24/7)
- Some EBS storage included
- First 12 months free
5. Reserved Instances (Production)
- 1-year commitment: 30-40% savings
- 3-year commitment: 50-60% savings
- Only for long-running production workloads
Current Setup vs Production
Current (Learning) Setup:
- On-Demand instances
- Development environment
- Can be destroyed when not in use
- Cost: ~$147/month (if running 24/7)
- Actual cost: ~$0-50/month (destroy when not testing)
Production Setup:
- Reserved or Spot instances
- Multi-region deployment
- Auto-scaling enabled
- Enhanced monitoring
- Cost: $500-2000/month (depending on scale)
Future Enhancements
Short-Term Improvements
1. Monitoring & Observability
- Set up Prometheus for metrics collection
- Deploy Grafana for visualization dashboards
- Configure CloudWatch Container Insights
- Implement AWS X-Ray for distributed tracing
- Set up alerting with PagerDuty or Slack
2. Security Hardening
- Enable AWS Secrets Manager for database passwords
- Implement Pod Security Policies
- Set up AWS WAF for web application firewall
- Enable VPC Flow Logs for network monitoring
- Implement least-privilege IAM policies
3. High Availability
- Multi-region deployment with Route53 failover
- Implement database backups with snapshots
- Set up cluster autoscaling
- Configure pod disruption budgets
- Implement horizontal pod autoscaling
4. CI/CD Enhancements
- Add automated testing to pipeline (Terratest)
- Implement automatic plan on PR
- Set up cost estimation with Infracost
- Add security scanning (Checkov, tfsec)
- Implement drift detection
5. GitOps Approach
- Migrate to ArgoCD or Flux for GitOps
- Separate infrastructure and application repos
- Implement automated sync from Git
- Set up progressive delivery
Long-Term Improvements
6. Advanced Kubernetes Features
- Service mesh implementation (Istio or Linkerd)
- Implement network policies
- Set up Kubernetes operators for database management
- Advanced scheduling with node affinity
- Implement custom metrics for HPA
8. Cost Management
- Implement Karpenter for cost-optimized scaling
- Set up Kubecost for Kubernetes cost visibility
- Configure AWS Compute Optimizer
- Implement spot instance interruption handling
- Create detailed cost allocation tags
9. Disaster Recovery
- Automated backup and restore procedures
- Multi-region replication
- Regular disaster recovery drills
- RPO/RTO documentation and testing
📞 Contact
Charles Asirifi
- 📧 Email: as@charlesas.com
- 💼 LinkedIn: linkedin.com/in/as-charles
- 🌐 Portfolio: charlesas.com
- 📁 GitLab: gitlab.com/ascharle
Acknowledgments
- Terraform AWS Modules – For well-maintained VPC and EKS modules
- Bitnami – For the production-ready MySQL Helm chart
- AWS Documentation – For comprehensive EKS guides
- HashiCorp Learn – For Terraform tutorials and best practices
- DevSecOps Bootcamp – For project requirements and guidance
Project Stats