
For this lab, we want to use Windows Defender Firewall with Advanced Security to edit an existing firewall rule. We want to enforce the following rules:
- Allow the connection for Key Management Service on the Domain and Private network.
- Deny the connection for Key Management Service on the Public network.
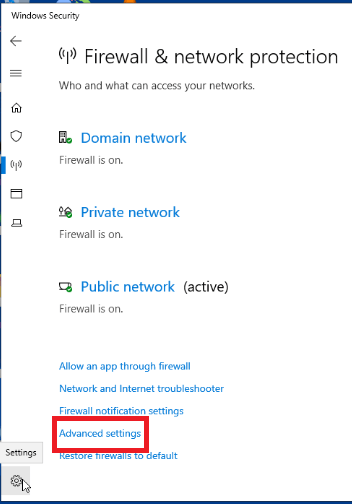
- Select Advanced settings on the Firewall & network protection screen.
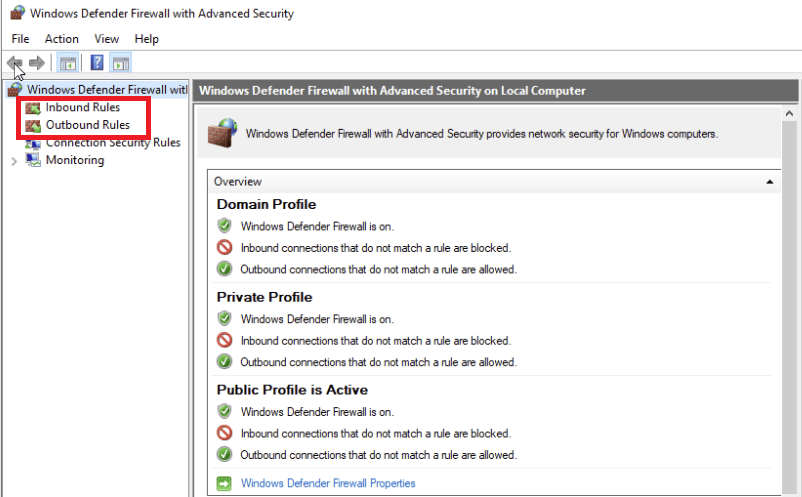
- Here you will see an Overview in the center panel. Make special note of the two rule types listed on the left panel:
- Inbound rules: Inbound rules determine what traffic is allowed to the computer.
- Outbound rules: Outbound rules determine what traffic is allowed to leave the computer.
- Connection security rules
- Monitoring
Each of these rules can be configured to filter traffic based on computers, users, applications, ports, protocols, and so on.
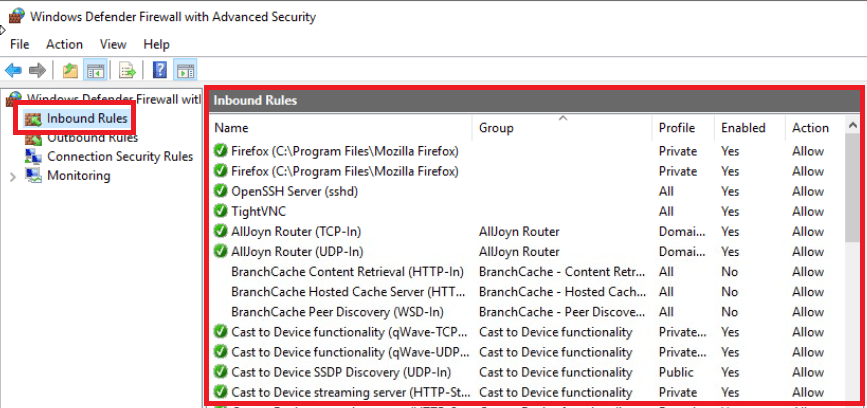
Click Inbound rules.
- Here you will see a long list of inbound rules. Note that some of the rules have a green checkmark next to them. This indicates that the rule is enabled to allow inbound communication. The rules without a checkmark are available for use but are not enabled.
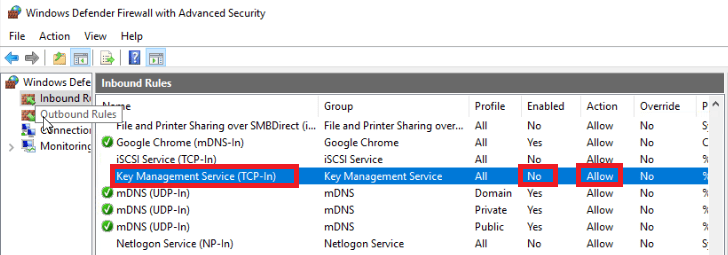
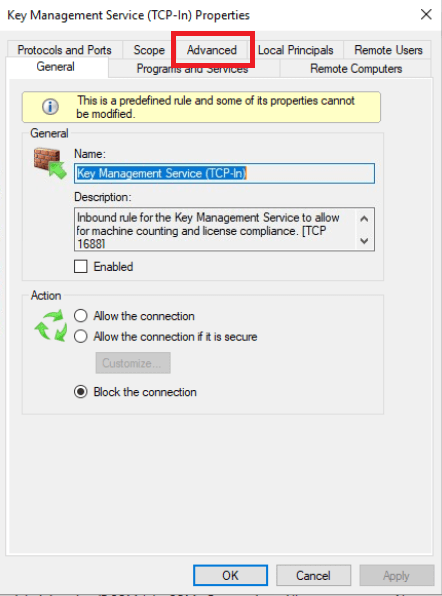
- Scroll to the Key Management Service inbound rule in the Overview panel of Windows Defender Firewall with Advanced Security. Note the following:
- The policy is currently not enabled (the Enabled column says No.)
- If enabled, the rule would allow communication (the Action column says Allow.)
Double-click this rule.
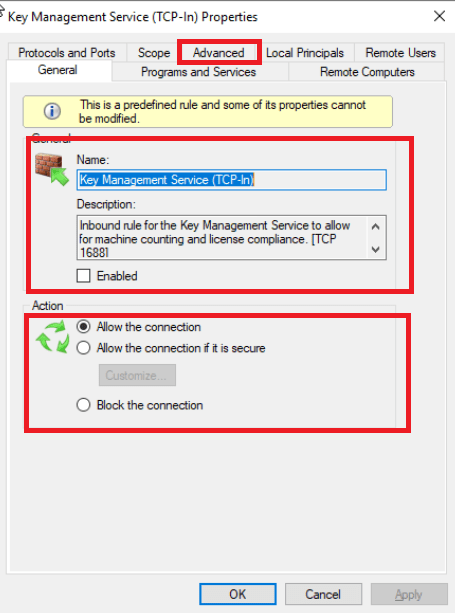
- Here you will see the details of this rule. You will note that the General tab includes the name of the rule, a description of the rule, and whether the rule has been allowed or blocked. In this case, the connection is allowed. Click the Advanced tab.
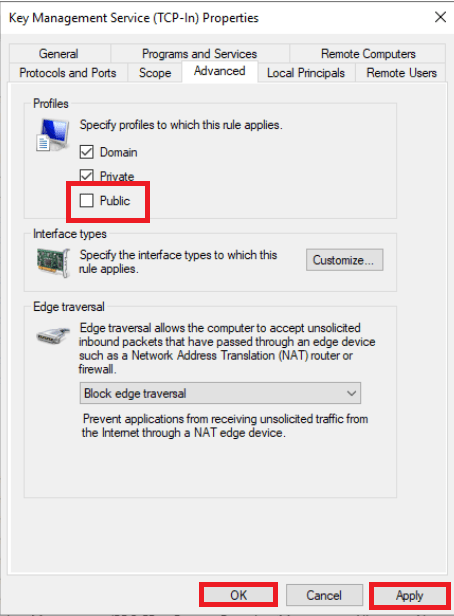
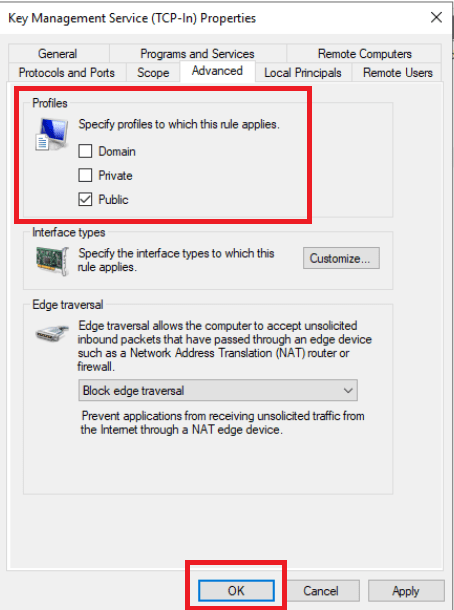
- Here you will see which profiles the rule applies to. In this case, Domain, Private and Public are all selected.

- Because we want to allow communication only with the domain and private networks, For Public this box should not have a checkmark. Next, click Apply, then click Ok.
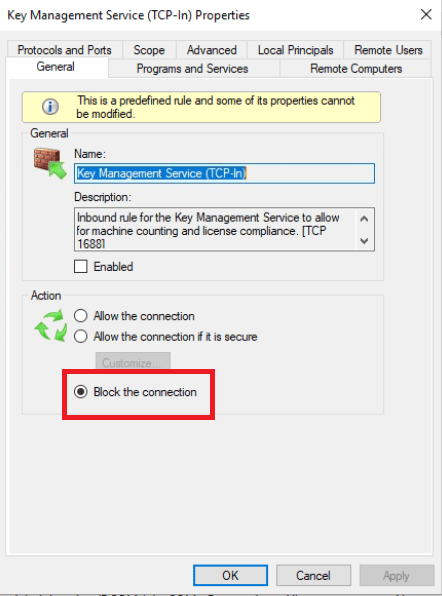
- Now we will create an inbound rule that blocks communication with the public network. Since the new rule will be similar to the last, we will copy the existing rule. Right-click the Key Management Service (TCP-In) inbound rule and click Copy. Press Ctrl+V to paste.
- You will now see a second Key Management Service (TCP-In) inbound rule. Double-click the second rule to open the **Key Management Service *TCP-IN) Properties.

- Since we want to block connection with the public network, select Block the connection on the General tab. Click Apply.
- Click the Advanced tab.
- Click the Domain and Private boxes to remove the checkmarks. Click the Public to add the checkmark. Click Ok.
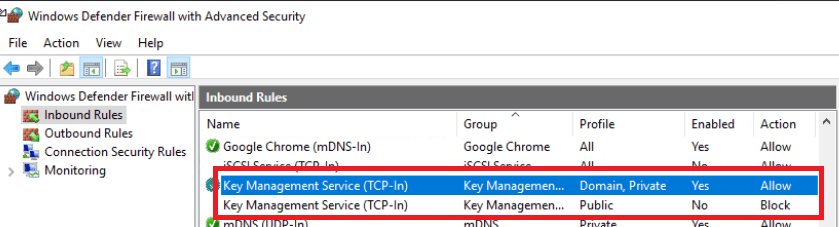
- The Overview panel will show your changes. Right-click each Key Management Service (TCP-In) rule and click Enable rule.

Congratulations, you have successfully completed this lab.