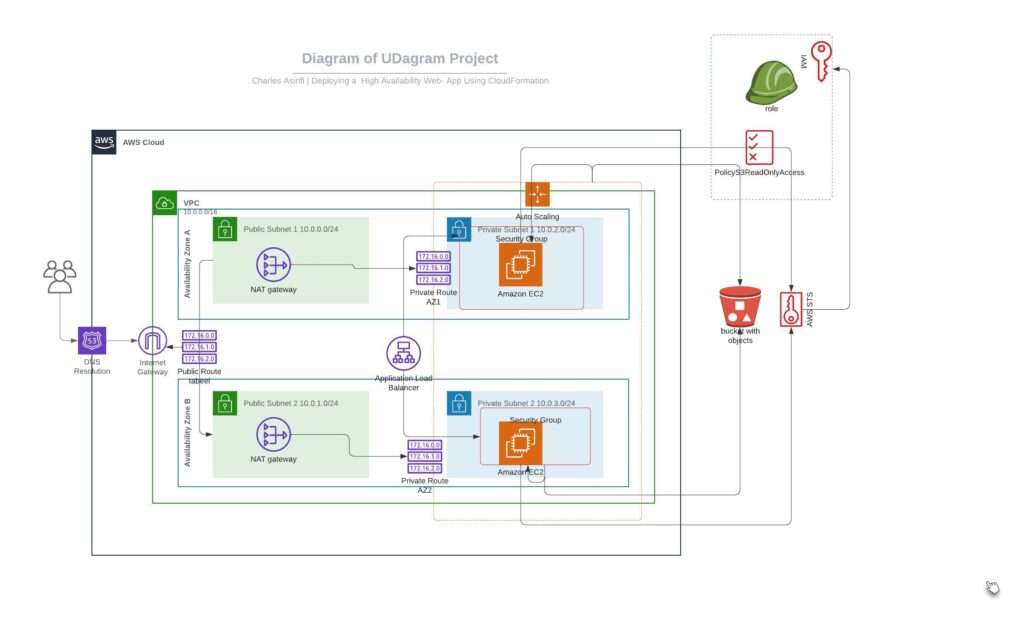
INTRODUCTION
The Coworking Space Service is a set of APIs that enables users to request one-time tokens and administrators to authorize access to a coworking space.
This service follows a microservice pattern and the APIs are split into distinct services that can be deployed and managed independently of one another.
For this project, you are a DevOps engineer who will be collaborating with a team that is building an API for business analysts. The API provides business analysts with basic analytics data on user activity in the coworking space service. The application they provide you functions as expected, and you will help build a pipeline to deploy it to Kubernetes.
Workspace Environment Requirements
Start by cloning the starter repository for the project.
If you’re using your own local computer, you’ll need:
- Python Environment – run Python 3.6+ applications and install Python dependencies via pip
- Docker CLI – build and run Docker images locally
- kubectl – run commands against a Kubernetes cluster
- helm – apply Helm Charts to a Kubernetes cluster
- GitHub – pull and clone code
Remote Resource Requirements
This project utilizes Amazon Web Services (AWS). You’ll find instructions for using a temporary AWS account on the next page. The AWS resources you’ll need to use for the project include:
- AWS CLI
- AWS CodeBuild – build Docker images remotely
- AWS ECR – host Docker images
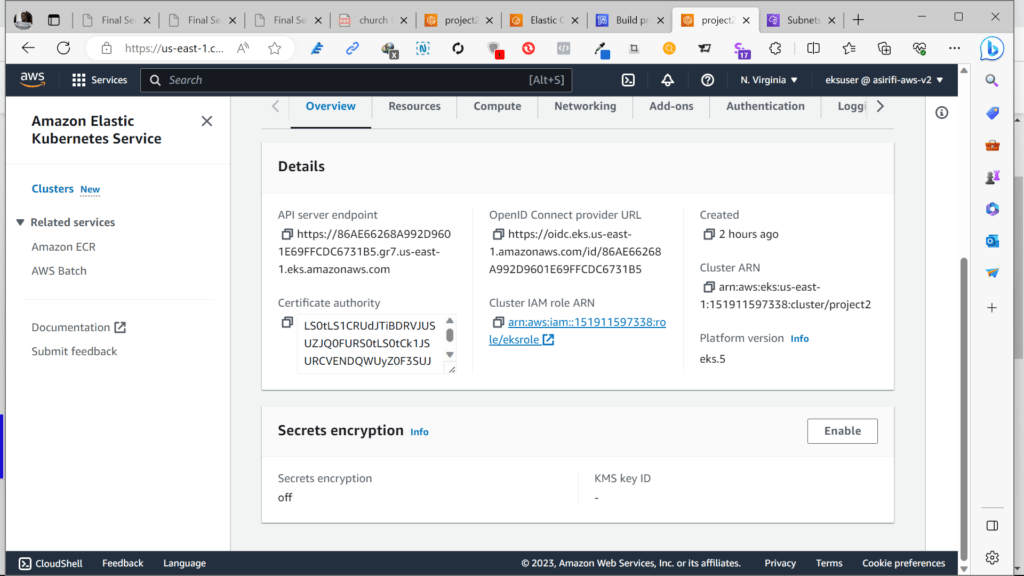
- Kubernetes Environment with AWS EKS – run applications in k8s
- AWS CloudWatch – monitor activity and logs in EKS
Configuring the Project
- Configure a database for the service.
Set up a Postgres database using a Helm Chart.
- Set up Bitnami Repo
helm repo add <REPO_NAME> https://charts.bitnami.com/bitnami
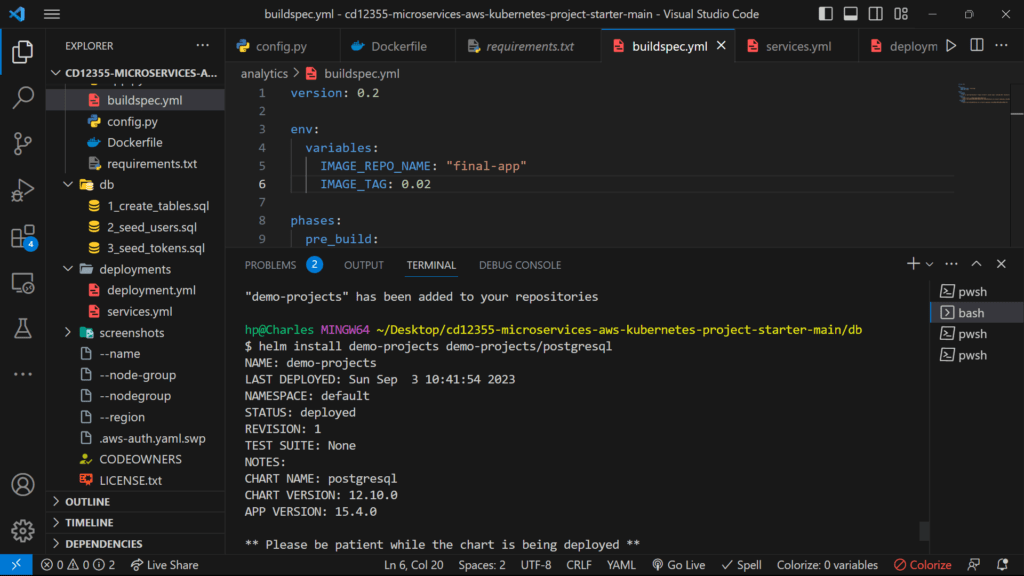
Install PostgreSQL Helm Chart
helm install <SERVICE_NAME> <REPO_NAME>/postgresql
This should set up a Postgre deployment at <SERVICE_NAME>-postgresql.default.svc.cluster.local in your Kubernetes cluster. You can verify it by running kubectl get svc
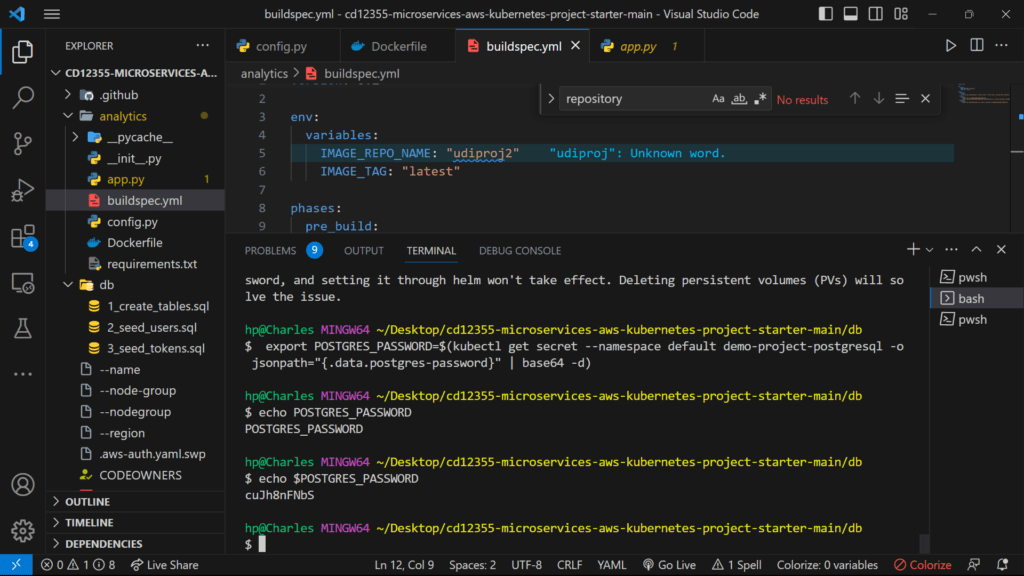
By default, it will create a username postgres. The password can be retrieved with the following command:
export POSTGRES_PASSWORD=$(kubectl get secret --namespace default <SERVICE_NAME>-postgresql -o jsonpath="{.data.postgres-password}" | base64 -d)
echo $POSTGRES_PASSWORD
The instructions are adapted from Bitnami’s PostgreSQL Helm Chart.
- Test Database Connection The database is accessible within the cluster. This means that when you will have some issues connecting to it via your local environment. You can either connect to a pod that has access to the cluster or connect remotely via
Port Forwarding
kubectl port-forward --namespace default svc/<SERVICE_NAME>-postgresql 5432:5432 &
PGPASSWORD="$POSTGRES_PASSWORD" psql --host 127.0.0.1 -U postgres -d postgres -p 5432
Connecting Via a Pod
kubectl exec -it <POD_NAME> bash
PGPASSWORD="<PASSWORD HERE>" psql postgres://postgres@<SERVICE_NAME>:5432/postgres -c <COMMAND_HERE>
Run Seed Files We will need to run the seed files in db/ in order to create the tables and populate them with data.
kubectl port-forward --namespace default svc/<SERVICE_NAME>-postgresql 5432:5432 &
PGPASSWORD="$POSTGRES_PASSWORD" psql --host 127.0.0.1 -U postgres -d postgres -p 5432 < <FILE_NAME.sql>- Running the Analytics Application Locally
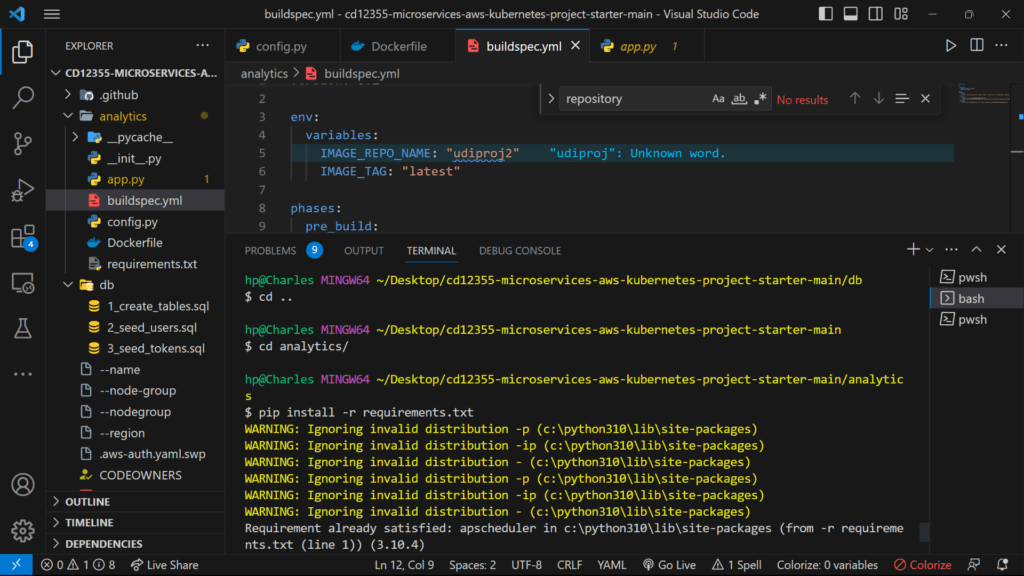
In the analytics/ directory:
- Install dependencies
pip install -r requirements.txt
There are multiple ways to set environment variables in a command. They can be set per session by running export KEY=VAL in the command line or they can be prepended into your command.
DB_USERNAME
DB_PASSWORD
DB_HOST (defaults to 127.0.0.1)
DB_PORT (defaults to 5432)
DB_NAME (defaults to postgres)
If we set the environment variables by prepending them, it would look like the following:
DB_USERNAME=username_here DB_PASSWORD=password_here python app.pyThe benefit here is that it’s explicitly set. However, note that the DB_PASSWORD value is now recorded in the session’s history in plaintext. There are several ways to work around this including setting environment variables in a file and sourcing them in a terminal session.
- Verifying The Application
Generate report for check-ins grouped by dates
curl <BASE_URL>/api/reports/daily_usage
Generate report for check-ins grouped by users

curl <BASE_URL>/api/reports/user_visits
Deployment
Set up a Postgres database with a Helm Chart.
Export the database password for future reference
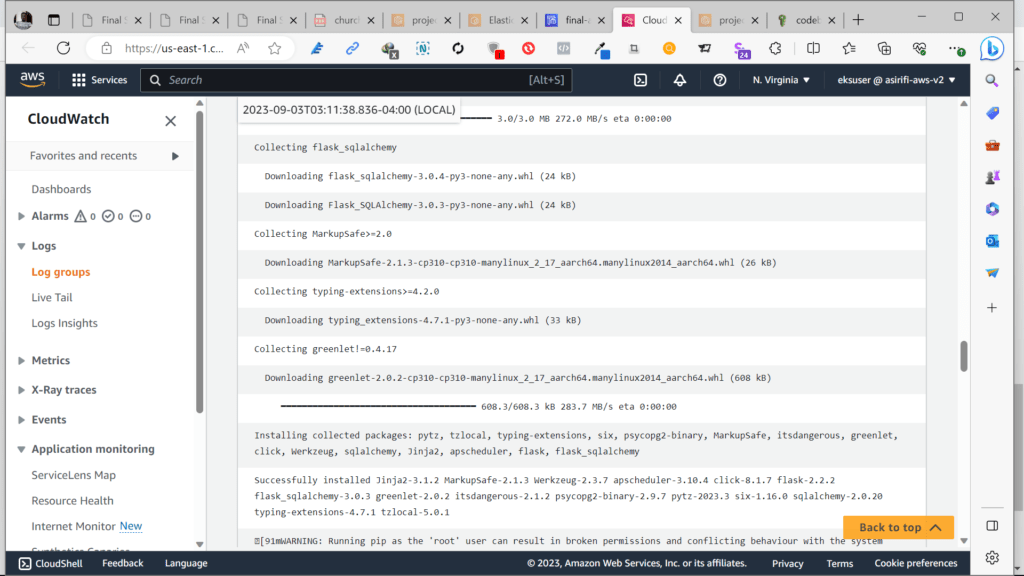
Install requirements
Create a Dockerfile for the Python application.
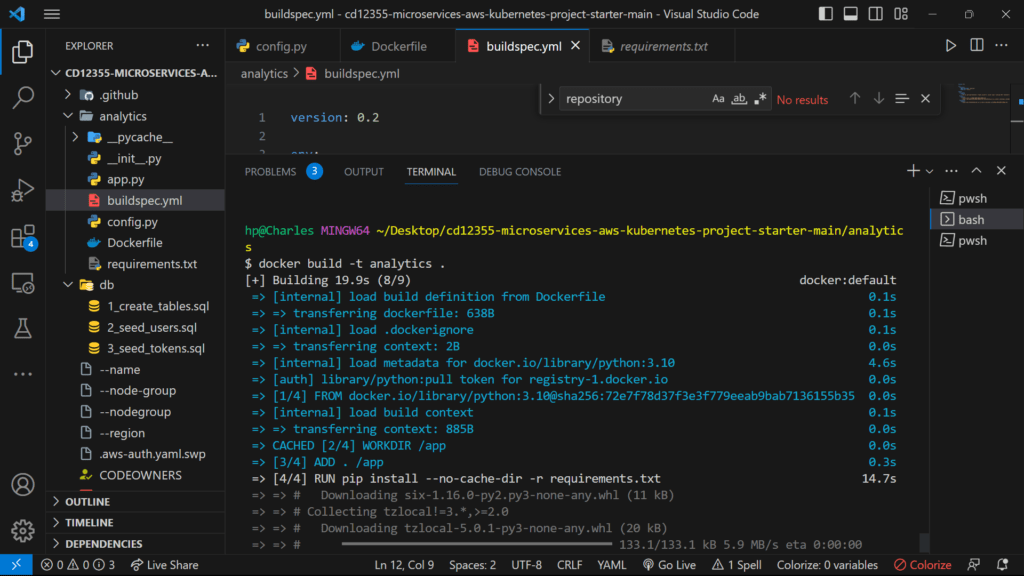
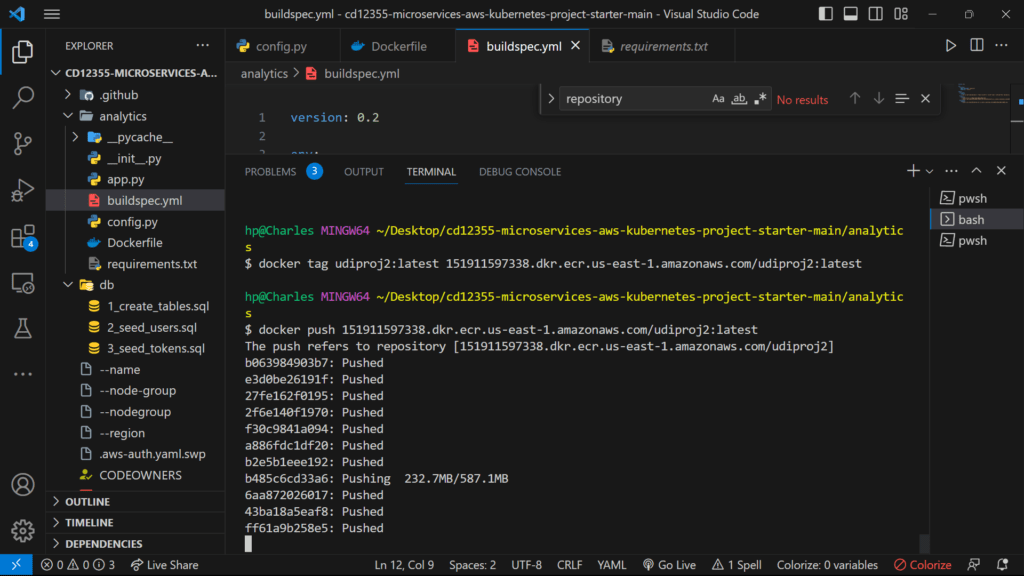
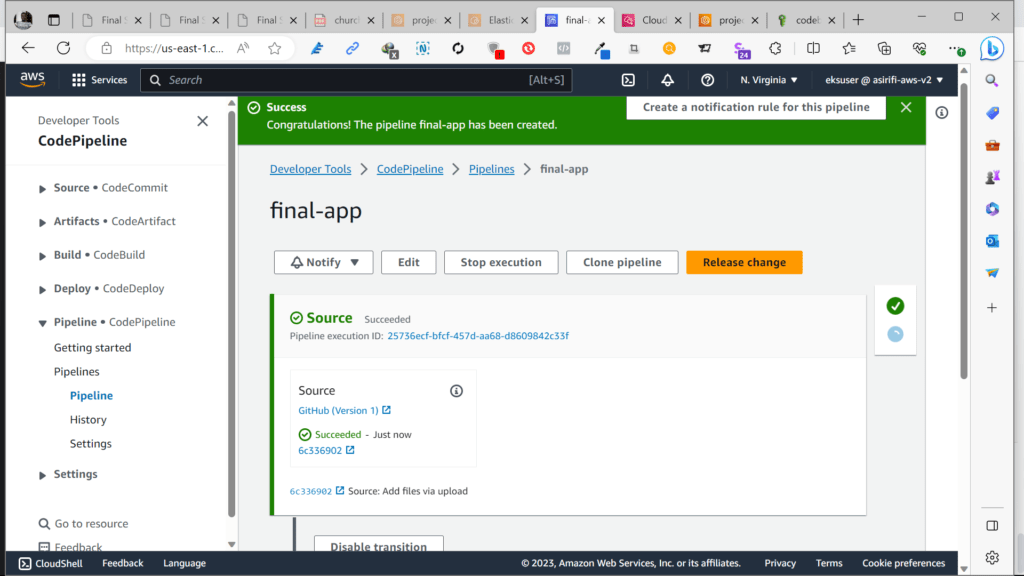
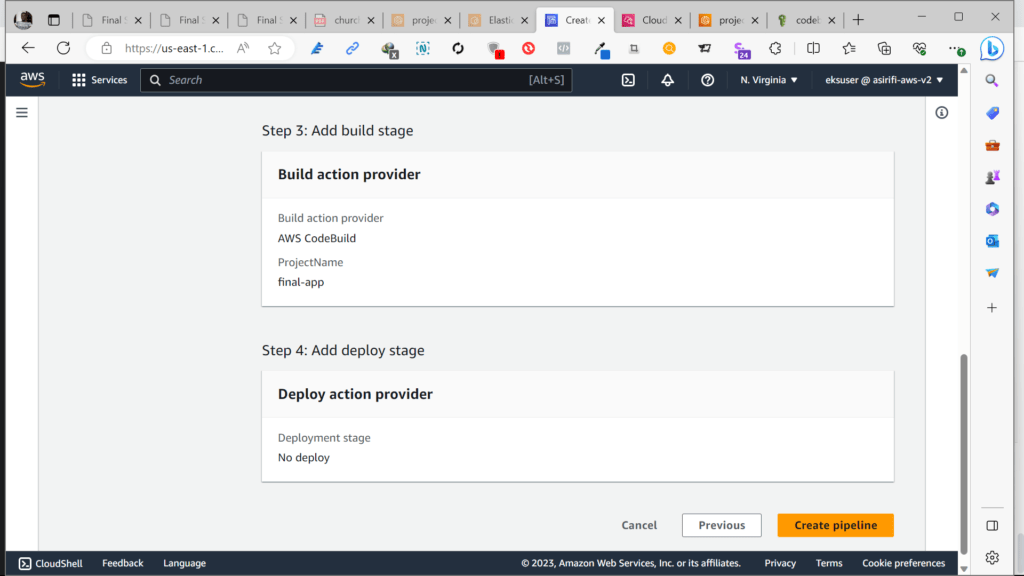
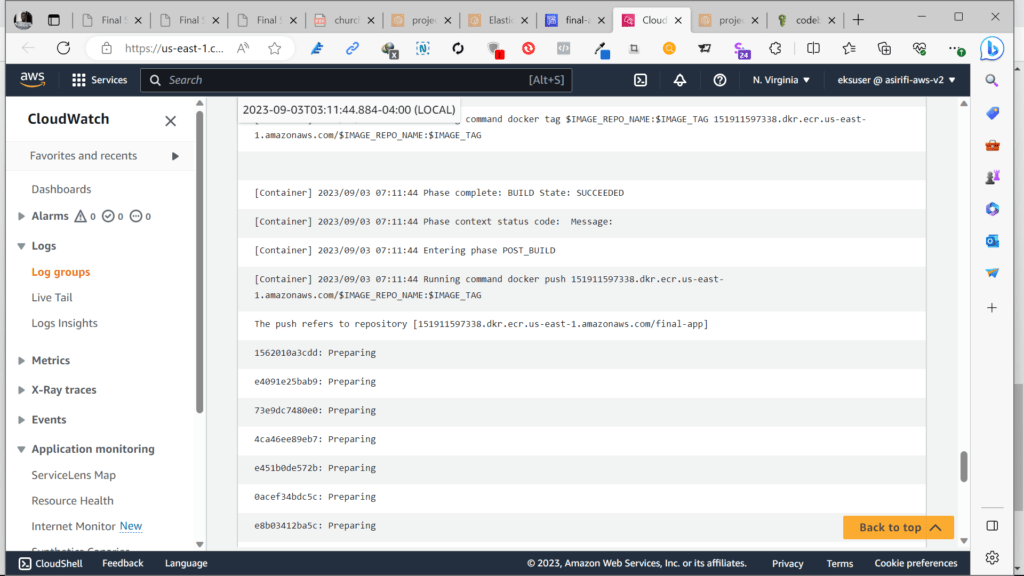
- Write a simple build pipeline with AWS CodeBuild to build and push a Docker image into AWS ECR.
- Take a screenshot of AWS CodeBuild pipeline for your project submission.
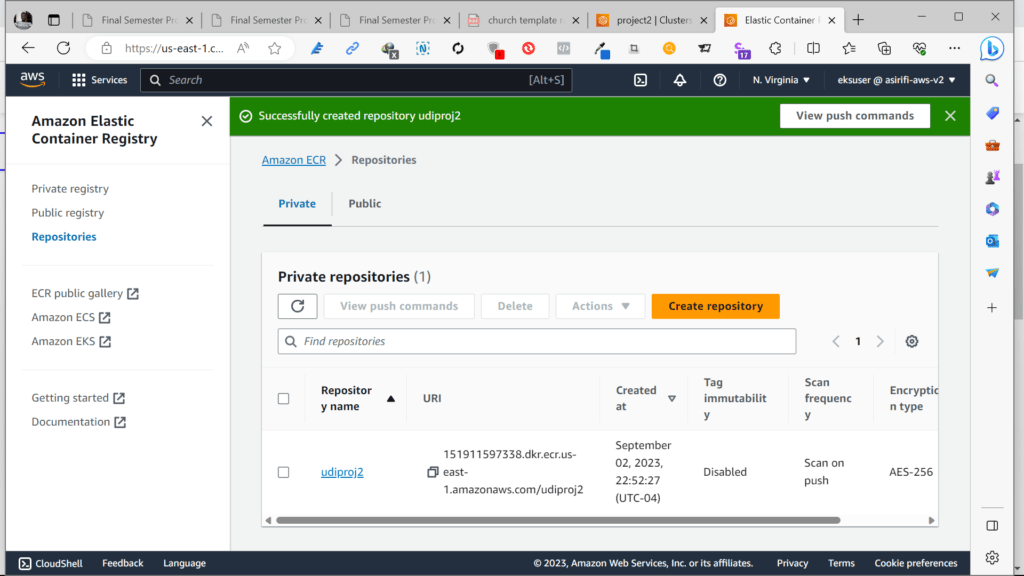
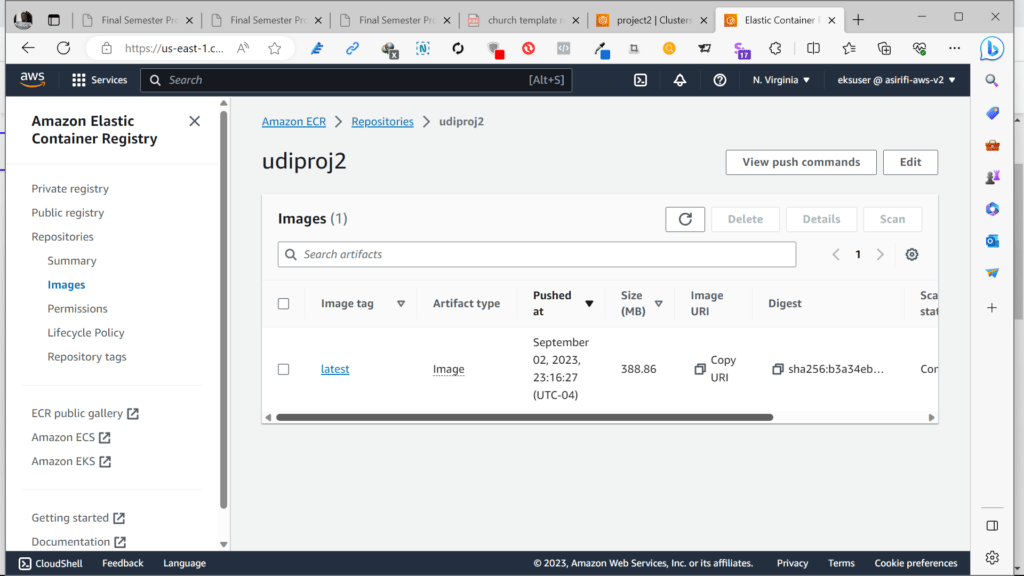
- Take a screenshot of AWS ECR repository for the application’s repository.

Create a service and deployment using Kubernetes configuration files to deploy the application.
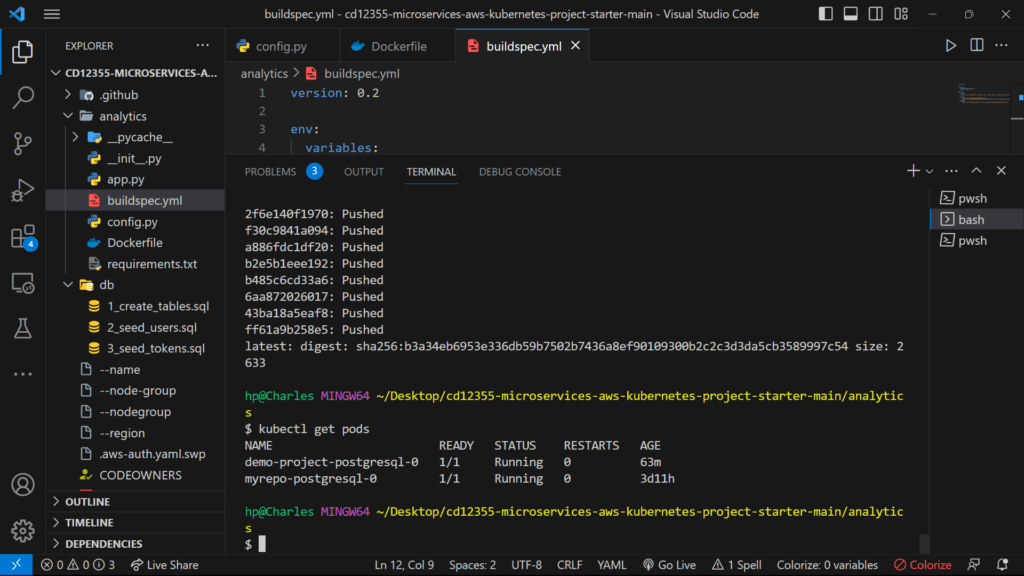
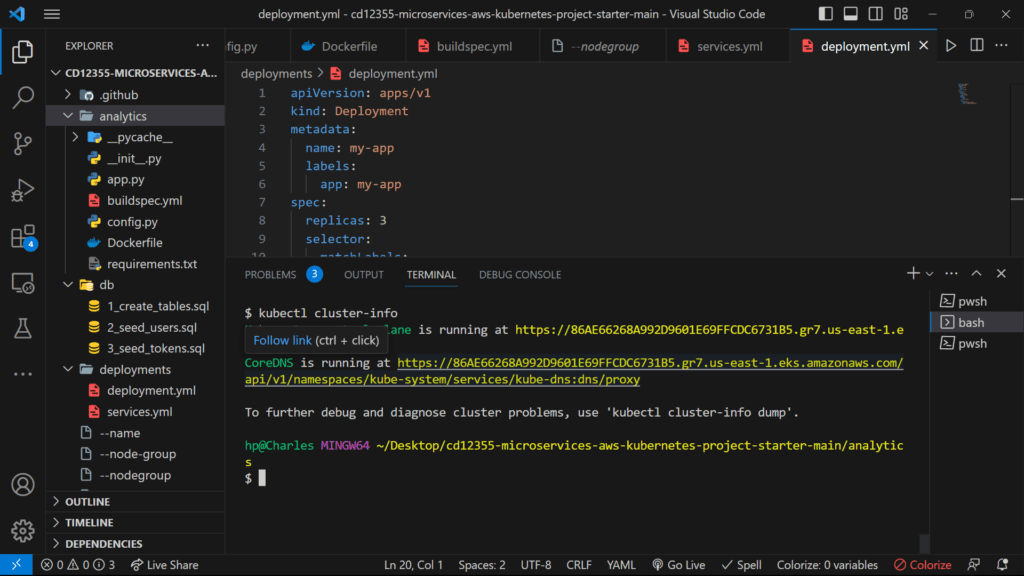
- Take a screenshot of running the kubectl get svc command.
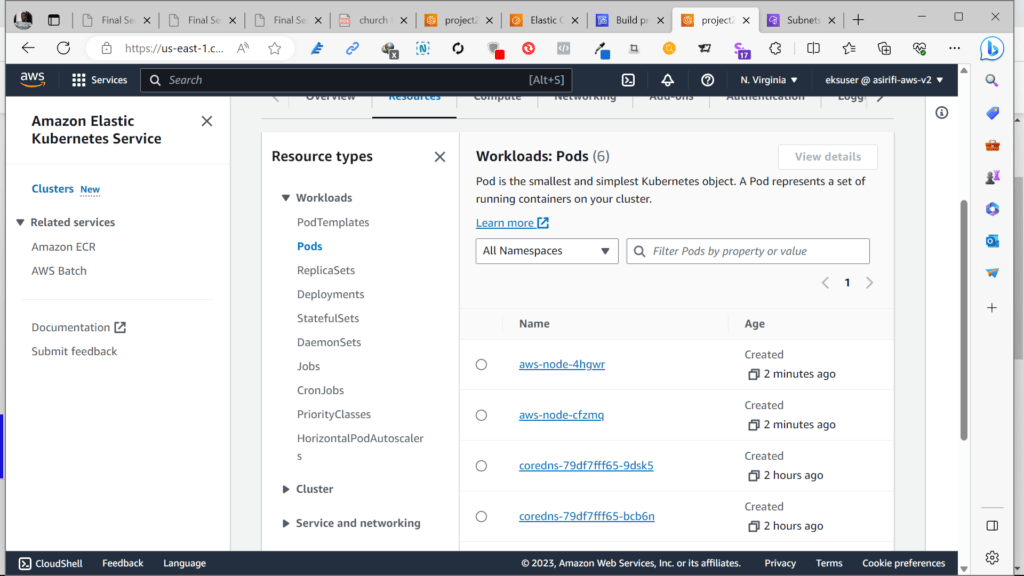
- Take a screenshot of kubectl get pods.
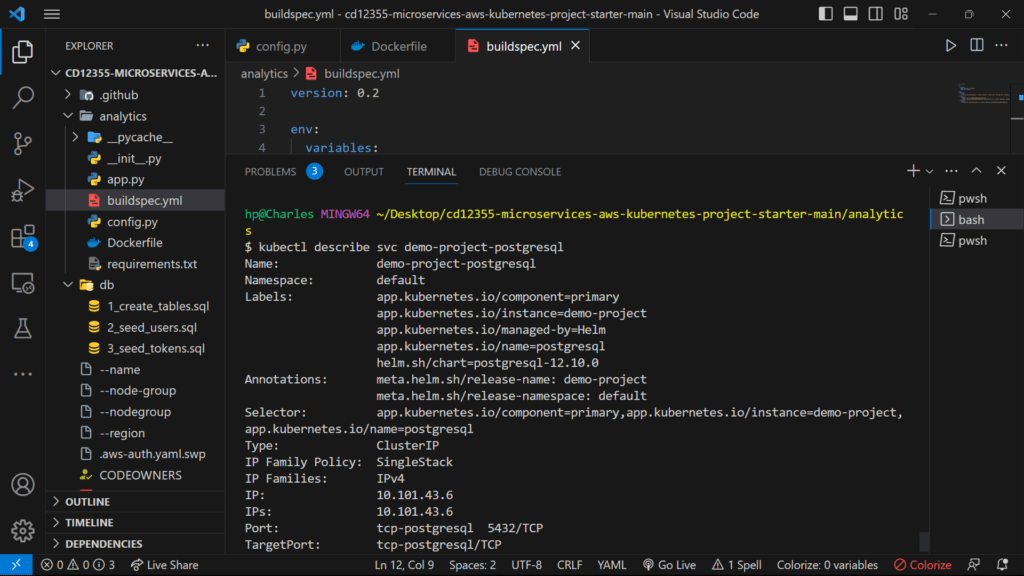
- Take a screenshot of kubectl describe svc <DATABASE_SERVICE_NAME>.
- Take a screenshot of kubectl describe deployment <SERVICE_NAME>.

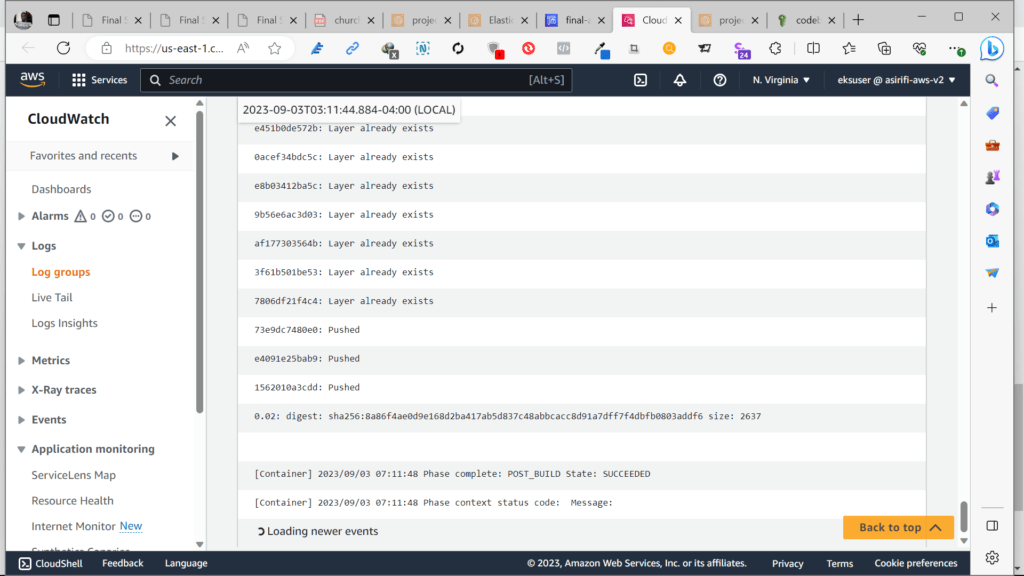
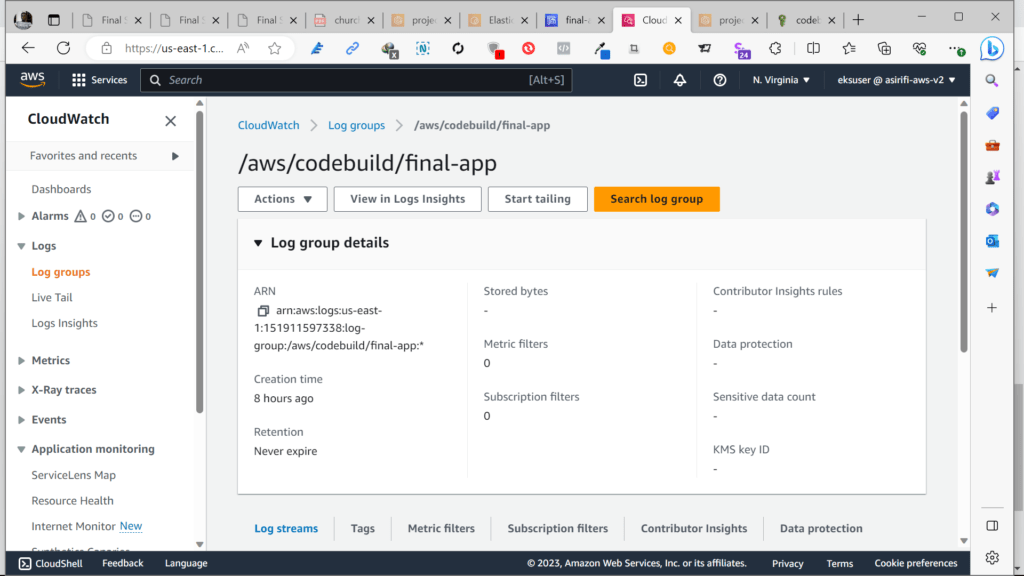
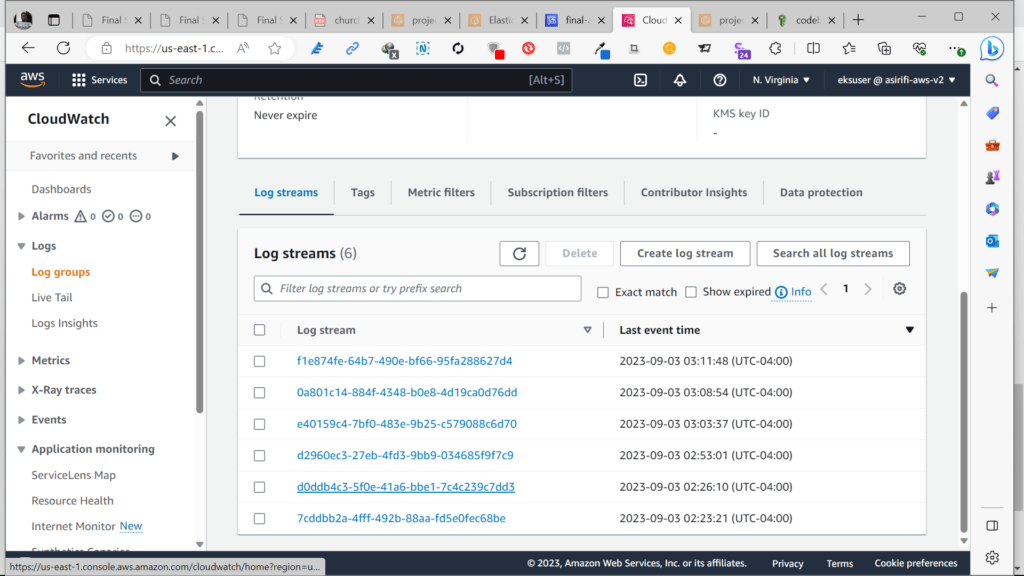
- Check AWS CloudWatch for application logs.
- Take a screenshot of AWS CloudWatch logs for the application.
Conclusion
The Coworking Space Service is now deployed and running on AWS EKS. The analytics API can be accessed via the LoadBalancer URL, and it provides business analysts with basic analytics data on user activity in the coworking space service.

 Suggestions

Specify Reasonable Memory and CPU Allocation in the Kubernetes Deployment Configuration

It is important to specify reasonable memory and CPU allocation in the Kubernetes deployment configuration to ensure the application runs efficiently. For this application, I recommend using the AWS t2.micro instance type as it provides a balance between compute power and cost.

Save on Costs
To save on costs, consider the following suggestions:

Use Spot Instances: AWS Spot Instances allow you to use spare EC2 computing capacity at a potentially