Objective
To create an AWS EC2 instance using Terraform and set up a WordPress blog on it.
Prerequisites
- AWS Account
- Terraform installed on your machine
- Basic understanding of AWS and Terraform
Steps
1. Set Up AWS CLI:
Before you start with Terraform, ensure you have AWS CLI set up and configured with the necessary access rights.
2. Initialize Terraform
Create a new directory for your Terraform configuration files and initialize Terraform.
mkdir terraform-wordpress
cd terraform-wordpress
terraform init
3. Create Terraform Configuration Files
a. Provider Configuration (provider.tf):
This file will contain the AWS provider details.
terraform {
  required_providers {
    aws = {
      source = "hashicorp/aws"
      version = "5.17.0"
    }
  }
}

provider "aws" {
  region = "us-east-1"
}
b. EC2 Configuration (ec2.tf):
Define the AWS resources required for the EC2 instance.
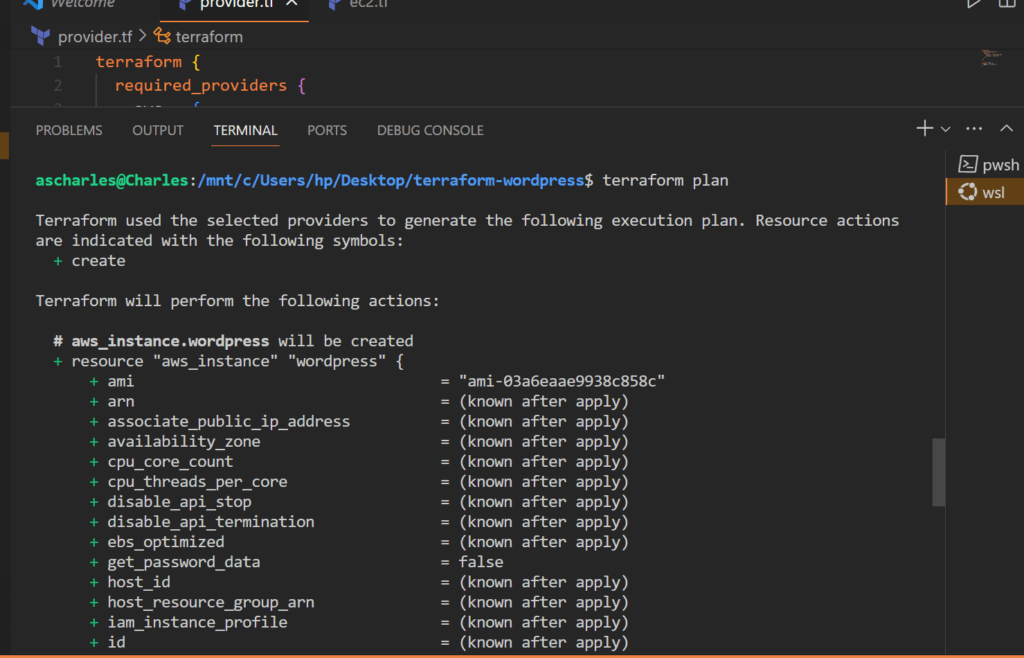
resource "aws_instance" "wordpress" {
  ami           = "ami-03a6eaae9938c858c" # This is the Amazon Linux 2 LTS AMI. Update if necessary.
  instance_type = "t2.micro"
  key_name      = aws_key_pair.deployer.key_name
  user_data = data.template_file.init.rendered
  vpc_security_group_ids = [aws_security_group.wordpress.id]
  tags = {
    Name = "TerraformWordPress"
  }
}

resource "aws_key_pair" "deployer" {
  key_name   = "deployer-key"
  public_key = file("/home/ascharles/.ssh/id_rsa.pub")
}

data "template_file" "init" {
  template = file("wordpressinstall.sh")
}
4. Apply Terraform Configuration:
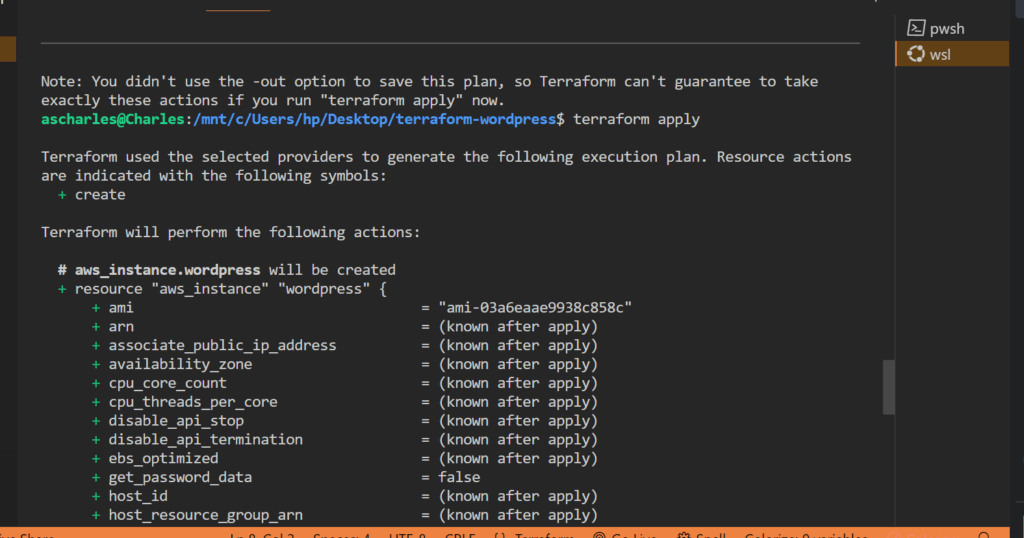
Run the following commands to apply your Terraform configurations:
terraform plan
terraform apply
5. Installing WordPress on EC2
a. SSH Key Pair: First, you’ll need an SSH key pair to access my EC2 instance.
I will create this using Terraform
resource "aws_key_pair" "deployer" {
  key_name   = "deployer-key"
  public_key = file("~/.ssh/id_rsa.pub")
}
I will then reference this key in my EC2 instance:
key_name = aws_key_pair.deployer.key_nameb. Security Group: Define a security group that allows SSH, HTTP, and HTTPS:
This is for practice and not the best option to give ssh full access but just for testing .
locals {
  wordpress_cidr_blocks = ["0.0.0.0/0"]
}

resource "aws_security_group" "wordpress" {
  name        = "wordpress"
  description = "Allow SSH, HTTP, and HTTPS"

  ingress {
    from_port   = 22
    to_port     = 22
    protocol    = "tcp"
    cidr_blocks = local.wordpress_cidr_blocks
  }

  ingress {
    from_port   = 80
    to_port     = 80
    protocol    = "tcp"
    cidr_blocks = local.wordpress_cidr_blocks
  }

  ingress {
    from_port   = 443
    to_port     = 443
    protocol    = "tcp"
    cidr_blocks = local.wordpress_cidr_blocks
  }

  egress {
    from_port   = 0
    to_port     = 0
    protocol    = "-1"
    cidr_blocks = local.wordpress_cidr_blocks
  }
}

resource "aws_security_group_rule" "allow_mysql" {
  type        = "ingress"
  from_port   = 3306
  to_port     = 3306
  protocol    = "tcp"
  cidr_blocks = ["${aws_instance.wordpress.public_ip}/32"]
  security_group_id = tolist(aws_db_instance.wordpress.vpc_security_group_ids)[0]


}
Attach this security group to your EC2 instance:
vpc_security_group_ids = [aws_security_group.wordpress.id]
I created a bash file to install PHP and WordPress on my EC2
#!/bin/bash
# Update the system
yum update -y
# Install Apache, PHP, and necessary PHP modules
yum install -y httpd php php-mysqlnd php-fpm
# Start and enable Apache
systemctl start httpd
systemctl enable httpd
# Install MySQL client
yum install -y mysql
# Download and set up WordPress
cd /tmp
wget https://wordpress.org/latest.tar.gz
tar -xzf latest.tar.gz
mv wordpress/* /var/www/html/
# Set permissions
chown -R apache:apache /var/www/html/
chmod -R 755 /var/www/html/
# Create a wp-config.php file
cd /var/www/html
cp wp-config-sample.php wp-config.php
# Update wp-config.php with database details
# Note: Replace 'database_name_here', 'username_here', 'password_here', and 'localhost' with your actual RDS details
sed -i 's/database_name_here/terraformwordpress/g' wp-config.php
sed -i 's/username_here/wordpress/g' wp-config.php
sed -i 's/password_here//g' wp-config.php
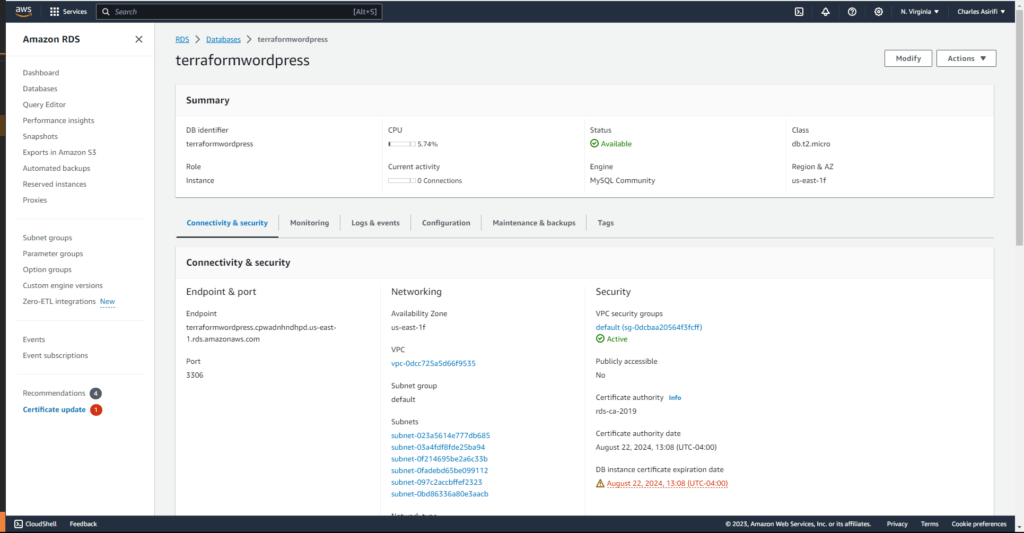
sed -i 's/localhost/terraformwordpress.cpwadnhndhpd.us-east-1.rds.amazonaws.com/g' wp-config.php
# Restart Apache
systemctl restart httpd
# Clean up
rm -rf /tmp/wordpress /tmp/latest.tar.gz
c. User Data Script: To automate the installation of WordPress, you can use a user data script. This script will install a LAMP stack and WordPress:
data "template_file" "init" {
  template = file("init-script.sh")
}

resource "aws_instance" "wordpress" {
  ...
  user_data = data.template_file.init.rendered
  ...
}
a. Use RDS for Database: Instead of using a local MySQL database on EC2, use AWS RDS for a more scalable and managed database solution.
You can set up an RDS instance using Terraform:
resource "aws_db_instance" "wordpress" {
  allocated_storage    = 20
  storage_type         = "gp2"
  engine               = "mysql"
  engine_version       = "5.7"
  instance_class       = "db.t2.micro"
  identifier           = "terrawordpress"
  username             = ""
  password             = ""
  parameter_group_name = "default.mysql5.7"
  skip_final_snapshot  = true
  vpc_security_group_ids = [aws_security_group.rds_sg.id]
}

resource "aws_security_group" "rds_sg" {
  name        = "rds-sg"
  description = "Security group for RDS instance"

  ingress {
    from_port   = 3306
    to_port     = 3306
    protocol    = "tcp"
    security_groups = [aws_security_group.wordpress.id]
  }

  tags = {
    Name = "rds-sg"
  }
}
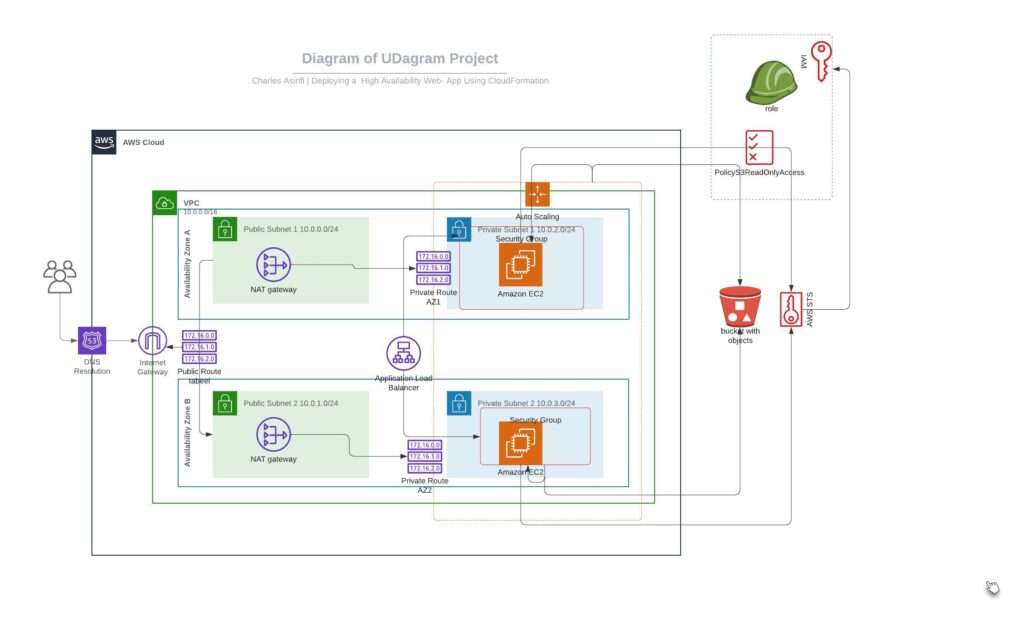
c. Use Elastic Load Balancing: Implement an Application Load Balancer (ALB) to distribute incoming application traffic across multiple targets.
# resource "aws_lb" "wordpress" {
#   name               = "wordpress-lb"
#   internal           = false
#   load_balancer_type = "application"
#   security_groups    = [aws_security_group.wordpress.id]
#   subnets            = ["subnet-023a5614e777db685", aws_subnet.subnet_2.id ]

#   enable_deletion_protection = false
# }

# resource "aws_lb_target_group" "wordpress" {
#   name     = "wordpress-tg"
#   port     = 80
#   protocol = "HTTP"
#   vpc_id   = "vpc-0dcc725a5d66f9535"
# }

# resource "aws_lb_listener" "front_end" {
#   load_balancer_arn = aws_lb.wordpress.arn
#   port              = "80"
#   protocol          = "HTTP"

#   default_action {
#     type             = "forward"
#     target_group_arn = aws_lb_target_group.wordpress.arn
#   }
# }
d. Set Up Auto Scaling: Implement EC2 Auto Scaling to ensure that you have the correct number of Amazon EC2 instances available to handle the traffic for your application.
# resource "aws_launch_configuration" "wordpress" {
#   name_prefix          = "wordpress-lc-"
#   image_id             = "ami-03a6eaae9938c858c"
#   instance_type        = "t2.micro"
#   security_groups      = [aws_security_group.wordpress.id]
#   user_data            = data.template_file.init.rendered
#   key_name            = aws_key_pair.deployer.key_name # Replace with your EC2 key pair name


#   lifecycle {
#     create_before_destroy = true
#   }
# }

# data "template_file" "init" {
#   template = file("wordpressinstall.sh")
# }


# resource "aws_autoscaling_group" "wordpress" {
#   name                 = "wordpress-asg"
#   launch_configuration = aws_launch_configuration.wordpress.name
#   min_size             = 1
#   max_size             = 5
#   desired_capacity     = 2
#   vpc_zone_identifier  = ["subnet-023a5614e777db685"]

#   target_group_arns = [aws_lb_target_group.wordpress.arn]

#   lifecycle {
#     create_before_destroy = true
#   }
# }
# resource "aws_autoscaling_attachment" "wordpress" {
#   autoscaling_group_name = aws_autoscaling_group.wordpress.name
#   lb_target_group_arn   = aws_lb_target_group.wordpress.arn
# }
Associate the Security Group with the RDS Instance
vpc_security_group_ids = [aws_security_group.rds_sg.id]
- Reference the Security Group in the Rule:
Now, when you want to reference the security group in the rule, you can use:
security_group_id = aws_security_group.rds_sg.id
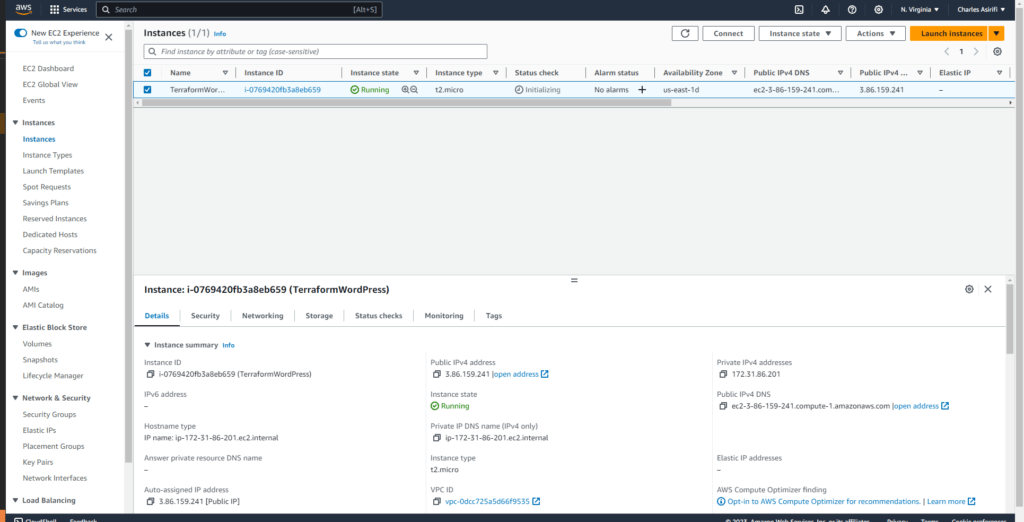
If you followed this post, you should have a working wordpress when you check your elastic load balancer dns or your ec2 public ip.
In my case, I went ahead to host my portfolio on my domain and you can use this link to check it up https://charlesas.com/
You can find the complete code on my github page : https://github.com/ascharle/terraformwordpress
Moral of the Project:
- Continuous Learning and Adaptation: In the realm of IT and especially with cloud services and web development, challenges are inevitable. The key is not to avoid challenges but to learn from them, adapt, and find solutions.
- Importance of Thorough Testing: Before deploying any changes, especially in a production environment, it’s crucial to test all aspects of the application to ensure functionality and security.
- Attention to Detail: Small oversights, like a syntax error in a configuration file, can lead to significant issues. It underscores the importance of meticulous review and understanding of configuration files and code.
Challenges Faced:
- Syntax Errors in Configuration: One of the primary issues you faced was syntax errors in the
wp-config.phpfile. Such errors can prevent the entire application from running, highlighting the importance of accurate syntax and thorough review. - Database Connection Issues: Ensuring that the web server can communicate with the database is crucial. You encountered challenges related to database connectivity, which can stem from various sources, including incorrect database credentials, firewall rules, or database server configurations.
- Security Group Configuration: Configuring security groups in AWS to allow the necessary traffic while maintaining security can be challenging. You faced issues related to granting access to the correct ports and ensuring that the EC2 instance and RDS instance could communicate.
- Terraform Configuration: Terraform is a powerful tool for infrastructure as code, but it requires precise configuration. You encountered challenges related to security group rules and ensuring that resources were correctly linked.
- Server and Service Management: Managing services on the EC2 instance, like Apache, requires understanding of system administration commands and principles. You faced challenges related to restarting services and ensuring they were running correctly.
- Log Analysis: Interpreting server logs is crucial for diagnosing issues. You had to navigate through various logs to pinpoint the root causes of the problems you were facing.